You can download the upgrade file for the SLP-NX (for Windows 10/11, English).
Please check the privacy policy at the bottom of this page, then fill in the customer information form to register and download the file.
File Information
| Device | Model NX-_ _ _ |
|---|---|
| Software | Model SLP-NX |
| Version | 5.00.3 (English) |
| Eligible users | Those who have the CD for an earlier version |
| Size | Approx. 132 MB |
- Model SLP-NX Upgrade (for Windows 10/11) English
- Model SLP-NX Upgrade (for Windows 7 SP1/8.1) Japanese
- Model SLP-NX Upgrade (for Windows 7 SP1/8.1) English
- Model SLP-NX Upgrade (for Windows 7 SP1) Japanese
- Model SLP-NX Upgrade (for Windows 7 SP1) English
- Model SLP-NX Upgrade (for Windows XP SP3/7 SP1) Japanese
- Model SLP-NX Upgrade (for Windows XP SP3/7 SP1) English
Note:
Only those who have the CD for an earlier version can update. If you have Windows 10 RTM or ver. 1511, please run Windows Update to update it to Windows 10 ver. 1607.
The following text is machine translated. Please be aware of this in advance.
SLP-NX Ver 5.XX Change Log
Version 5.00.3 (May 2025)
Added support for Windows 11.
Version 5.00.0 (April 2017)
Added support for Windows 10 Ver 1607 (Start of support: April 2017)
Project file format has been changed to SLX2.
*****************************************************************************
Network Instrumentation Module Model NX-_ _ _
Azbil Corporation
*****************************************************************************
- Download the setup file.
- Extract (unzip) the saved file. (You can use a non-Windows extraction (unzipping) tool.)
- Double-click "update.exe" in the extracted (unzipped) folder to run the installer.
- Follow the instructions to complete the installation.
Handling Precautions:
If you get an error message, restart your PC and run "update. exe" again.
Handling Precautions:
In SLP-NX ver. 5.00, project files are created in SLX2 format. SLX2 files are not compatible with SLX files created in SLP-NX ver. 4.01 or earlier versions, so they cannot be opened with these earlier versions of the software.
To open an SLX project file with SLP-NX ver. 5.00, select "SLP-NX project file (*. SLX)" as the file format. The file will be converted to an SLX2 project file, and the original SLX file will be saved to the backup folder.
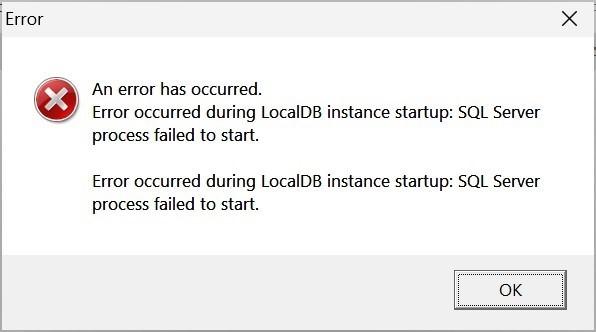
When starting the SLP-NX on a Windows 11 PC, the following SQL Server-related error may be displayed and the loader may not function properly.
Example: “Error occurred during LocalDB instance startup: SQL Server process failed to start.”
This is an error related to the SQL Server used by the SLP-NX, and Microsoft has provided troubleshooting instructions.
Reference: Troubleshoot errors related to system disk sector size greater than 4 KB
The action to take varies depending on your situation:
●If you have upgraded a Windows 10 PC that runs the SLP-NX to Windows 11
→ Please perform steps 1 to 11 on the following pages.
●If you have installed the SLP-NX for the first time on a Windows 11 PC
→ Please perform steps 1 to 14 (excluding step 11) on the following pages.
Countermeasure
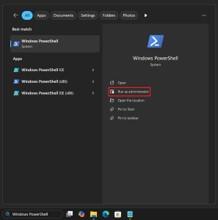
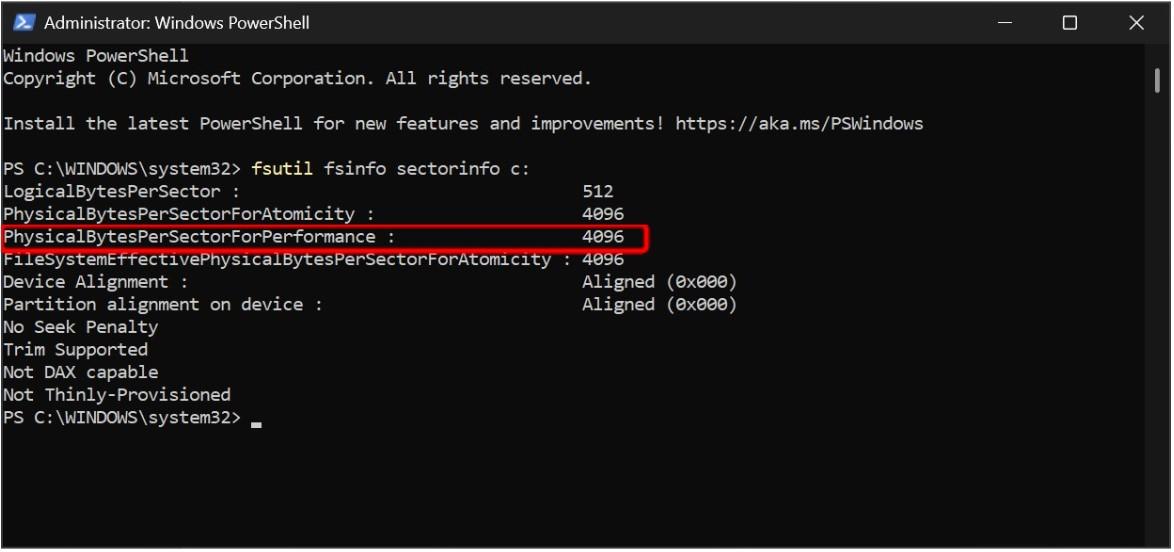
(1) Run Windows PowerShell as an administrator.
(2) Type “fsutil fsinfo sectorinfo c:” and press Enter.
(3) Check that the value for "PhysicalBytesPerSectorForPerformance" is greater than 4096.
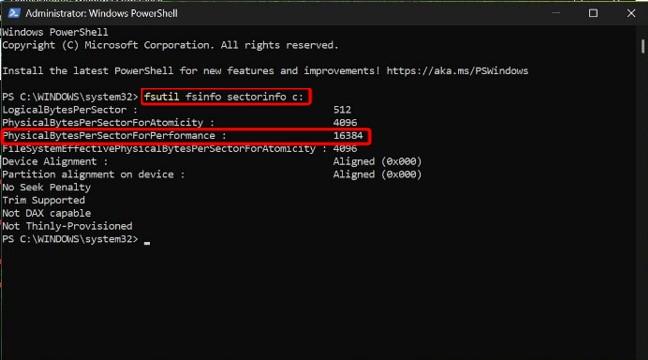
※ If the value is 4096 or less, this countermeasure is not necessary. Please contact us.
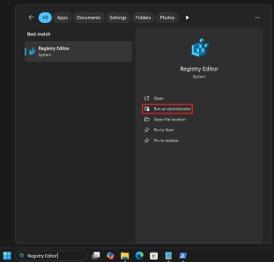
(4) Run the Registry Editor as an administrator.
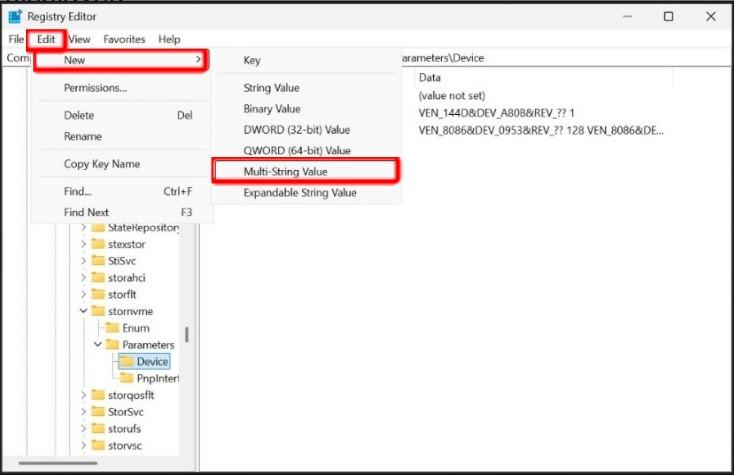
(5) Navigate to “Computer\HKEY_LOCAL_MACHINE\SYSTEM \CurrentControlSet\Services\stornvme\Parameters\Device”
(6) Click [Edit] → [New] → [Multi-String Value] and right click “New Value #1” that is displayed,
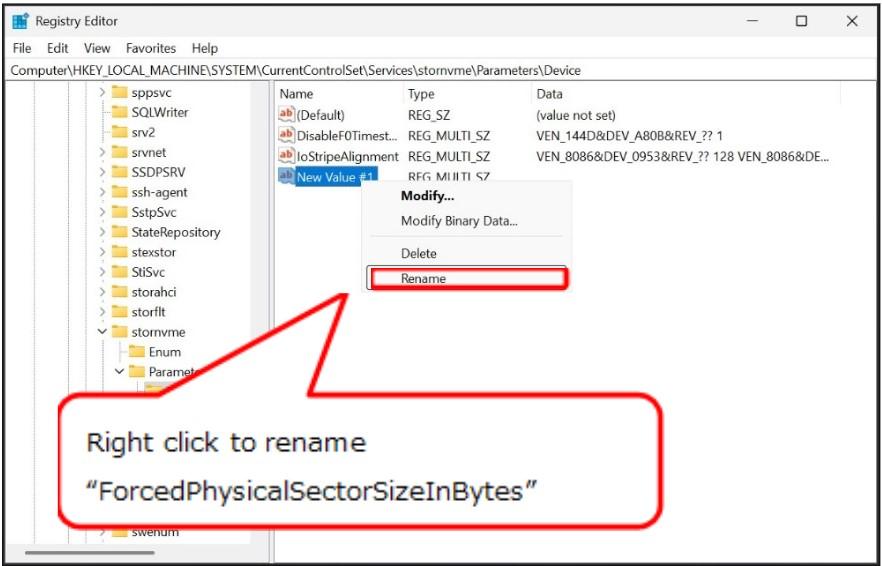
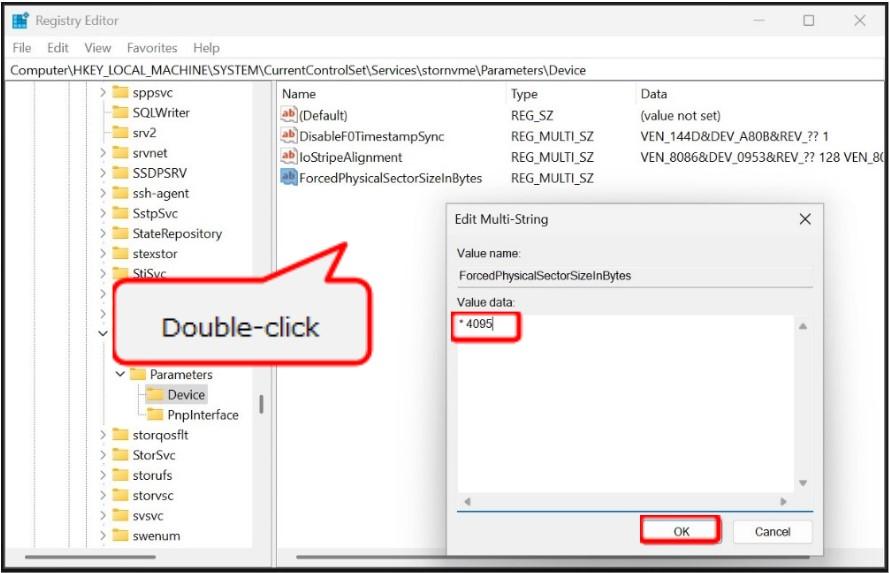
(7) Double-click “ForcedPhysicalSectorSizeInBytes” and enter "* 4095" in [Value data].
There should be a space between the * and 4095.
If the value cannot be set (for example, the OK button is disabled or an error message appears), add a line break at the end of the value.
(8) Click [OK] and close the Registry Editor.
(9) Restart the PC. (The changes made in steps 4 to 8 will be applied when the PC is restarted.)
(10) Perform steps 1 and 2 again to check that the value for "PhysicalBytesPerSectorForPerformance" is now 4096.
(11) Check that the SLP-NX can be started.
◆If you cannot start the loader even after performing steps 1 to 11
(12) Search for the following folder:
C:\Users\(user name)\AppData\Local\Microsoft\Microsoft SQL Server Local DB\Instances\SLPNX_LOCALDB
・If you cannot find it by entering the entire path, go to C: and open “Users” and the subfolders shown above one by one.
・If you are asked for administrator privileges to open the folder, open it as an administrator.
(13) Rename the SLPNX_LOCALDB folder (Ex. SLPNX_LOCALDB_old).
If multiple user accounts have been registered on the PC, there will be multiple (user name) folders. Rename the SLPNX_LOCALDB folder of each SLP-NX user in the same way.
(14) Start the SLP-NX.